NOFire AI supports both AWS OpenSearch Service and self-hosted OpenSearch instances using JWT bearer token authentication for secure, standardized access.
Prerequisites
Before connecting OpenSearch to NOFire AI, ensure you have:- An OpenSearch cluster (AWS OpenSearch Service version 2.11+ or self-hosted)
- Network access to your OpenSearch endpoint from NOFire AI
- Admin access to configure authentication
- For AWS OpenSearch: Fine-grained access control enabled
Step 1: Configure OpenSearch Authentication
Choose the authentication method based on your OpenSearch deployment:Option A: AWS OpenSearch Service (JWT Authentication - Recommended)
AWS OpenSearch Service supports JWT authentication for secure, token-based access. This requires OpenSearch version 2.11 or later with fine-grained access control enabled.1. Generate an RSA Key Pair
Generate an RSA public/private key pair using OpenSSL:publickey.pem file contains your public key, and privatekey.pem contains the private key for signing JWTs.
You can also use ECDSA encryption. Both RSA and ECDSA asymmetric algorithms are supported. Learn more in the AWS OpenSearch JWT documentation.
2. Update Domain Access Policy
Before enabling JWT authentication, update your domain access policy to allow JWT-authenticated requests:3. Enable JWT Authentication
In the AWS Console or using the AWS CLI: Via AWS Console:- Navigate to Amazon OpenSearch Service > Select your domain
- Under Domain configuration, find JWT authentication and authorization for OpenSearch
- Select Enable JWT authentication and authorization
- Upload your
publickey.pemfile or paste its content - (Optional) Configure Subject key (default:
sub) and Roles key (default:roles) - Save the changes
4. Create a JWT Token
Generate a JWT token signed with your private key. The token must include:- Subject (
sub): A valid OpenSearch user - Roles (
roles): Array of OpenSearch roles (e.g.,["readall"])
privatekey.pem using RS256 or ES256 algorithm.
5. Note Your Connection Details
You’ll need:- OpenSearch Endpoint:
https://search-your-domain.region.es.amazonaws.com - JWT Token: The signed token from step 4
Option B: Self-Hosted OpenSearch (Bearer Token Authentication)
For self-hosted OpenSearch instances, use JWT bearer token authentication.1. Configure JWT Authentication
Edit youropensearch.yml to enable JWT authentication:
2. Create Service Account or User
Access OpenSearch Dashboards and create an internal user for the token:- Navigate to OpenSearch Dashboards (typically
https://your-opensearch-host:5601) - Go to Security > Internal Users
- Click Create internal user
- Set username:
nofireai-logs-reader - Set as service account with
"service": "true"attribute - Assign appropriate roles (e.g.,
readall)
3. Generate Bearer Token
Create a JWT token with appropriate claims or use your identity provider’s token. The token should include:- User identity claims: Subject matching the OpenSearch user
- Role/permission information: Roles array with read permissions
For detailed JWT configuration on self-hosted OpenSearch, see the OpenSearch Authentication Tokens documentation.
4. Note Your Connection Details
You’ll need:- OpenSearch URL:
https://opensearch.mycompany.com:9200 - Bearer Token: Your JWT token
Step 2: Add OpenSearch Connection to NOFire AI
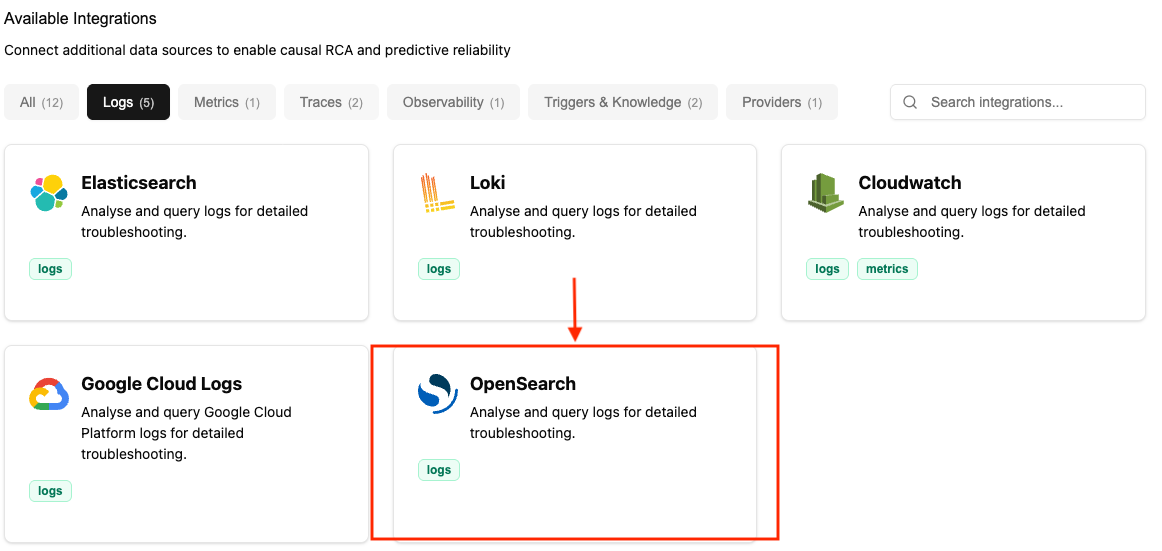
Navigate to the Connections Tab
Navigate to the Connections Tab
-
Select OpenSearch: From the list of available connections
-
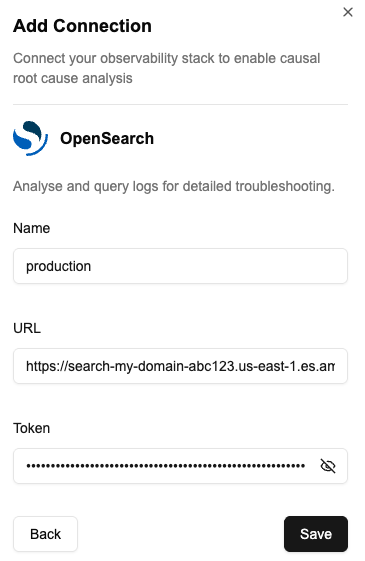
Enter Connection Details:
- Connection name: Enter a descriptive name (e.g., “production-opensearch”)
- URL: Your OpenSearch endpoint
- AWS Example:
https://search-my-domain-abc123.us-east-1.es.amazonaws.com - Self-hosted Example:
https://opensearch.mycompany.com:9200
- AWS Example:
- Token: The JWT token you created in Step 1
- For AWS OpenSearch: The JWT token from Option A
- For Self-Hosted: The bearer token from Option B
- Test and Save: Click Test Connection to verify the credentials, then Save to create the connection. Once the connection to your log source is established, NOFire AI will query and analyze logs on-demand as part of its causal root cause analysis. Logs are queried only when needed to enrich investigations.